FFR Photoshop Resources/Tutorial Thread

Collapse
This is a sticky topic.
X
X
 
  • Time
  • Show
Clear All
new posts
  • Kanzas
    Buh
    • Jul 2014
    • 1459

    #16
    Re: FFR Photoshop Resources/Tutorial Thread

    Never messed with PS or Gimp...

    Is Gimp good? I don't wanna get PS.


    Top 5
    Pimp Slap - 7-0-0-1
    party 4u "holy nite mix" v2 - 5-0-1-2
    Fei Longer - AAA
    HELLBEAT - 9-0-1-3
    Flame Repellent - 5-0-0-0

    Comment

    • ~Zero~
      FFR Veteran
      FFR Simfile Author
      • Nov 2006
      • 1556

      #17
      Re: FFR Photoshop Resources/Tutorial Thread

      Originally posted by choof
      i already have all the grunge fonts from dafont
      Why you stealing my strats.


      Originally posted by Xiaounlimited
      More like Tier ~0~

      Comment

      • noname219
        FFR Wiki Admin
        • May 2007
        • 1694

        #18
        Re: FFR Photoshop Resources/Tutorial Thread

        Originally posted by Kanzas
        Never messed with PS or Gimp...

        Is Gimp good? I don't wanna get PS.
        Gimp is pretty good for its purpose. It's missing a lot of features Photoshop has but the comparisons between the two are really unfair. I think it's a good alternative if you don't make a ton of photo editing.

        Comment

        • Mahou
          魔法少女
          • Jan 2006
          • 2153

          #19
          Re: FFR Photoshop Resources/Tutorial Thread

          Meh, I would have kept it active but there aren't a lot peeps that talk about Photoshop on FFR.
          Originally posted by lofty rhino
          one does not simply hate everyone that plays stepmania
          AND watch anime.

          Comment

          • ~Zero~
            FFR Veteran
            FFR Simfile Author
            • Nov 2006
            • 1556

            #20
            Re: FFR Photoshop Resources/Tutorial Thread

            Originally posted by Mahou
            Meh, I would have kept it active but there aren't a lot peeps that talk about Photoshop on FFR.
            Teach me all you know, I'm interested.


            Originally posted by Xiaounlimited
            More like Tier ~0~

            Comment

            • Mahou
              魔法少女
              • Jan 2006
              • 2153

              #21
              Re: FFR Photoshop Resources/Tutorial Thread

              Originally posted by ~Zero~
              Teach me all you know, I'm interested.
              Skype - mmmihc
              Originally posted by lofty rhino
              one does not simply hate everyone that plays stepmania
              AND watch anime.

              Comment

              • Spenner
                Forum User
                • Nov 2006
                • 2403

                #22
                Tutorial Time

                Hey guys. Thought I'd share a tutorial for something fun I do when I'm bored in photoshop but short on time. Really simple concept that can lead to very dynamic results.

                By the way, I'm leaving this an open thread for random tutorials you guys might know that are interesting, feel free to share.

                For this tutorial I'm using Photoshop CS6, but any previous or future versions should work almost identically.

                - Start by creating a New document that is a square, it can be any size


                - Choose a Foreground and Background colour, again it can be anything your heart desires


                - Fill the canvas with either colour

                - Navigate: Filter > Render > Difference Clouds
                ... - CTRL+F a few times to make the render more complex/mix the colours


                - Next we need to break down the image a bit, so: Filter > Pixelate > Mezzotint. Use anything you want, but I pick Short Lines generally


                - Now things will get a bit smoother, apply: Filter > Blur > Radial Blur. Choose Zoom, and select Best quality, with the full amount


                - To add more details, you have options. You can use Mezzotint again, and re-apply the Radial Blur again (use the blur twice to optimally smooth things), or use something like Filter > Stylize > Find Edges to more or less randomize your results. For this I'm going to use Find Edges and invert my image (CTRL+I), then apply Radial Blur again


                - Now we need to apply some sort of distortion to our starburst. You have many options-- virtually anything in the Filter > Distort panel, or Filter > Liquify, or anything you can come up with. For this example I'm just going to use Filter > Distort > Twirl at the default value


                - Finally, duplicate your creation layer with CTRL+J, Transform with CTRL+T, right click on the image, and click Flip Horizontal (you can rotate or flip the image however you like though)


                - The last step is to select what blend mode you want your layers to interact with. Make sure your duplicated/topmost layer is selected and click above the Layers panel where it says "Normal", select either Darken or Lighten, depending on the type of render you've made, and you should get favourable results with one of them. If you have darker artwork, I suggest a lightening blend mode, but you'll see for yourself


                Voila. This one was using "Lighten"


                And here's the same artwork but inverted, with "Darken". I also rotated my duplicated layer 90 degrees


                Take these instructions as a grain of salt, you have a great deal of freedom exploring the concept of blending bursts of colour with layer blend modes, this is basically an introduction into how they can blend and produce dynamic results-- the Radial Blur starburst shape is just a nice symmetrical example, the same pixelation with Motion Blur instead, and then distorting it, can also produce some interesting things.

                Here's a few more examples I made yesterday at work. Once you get this little workflow down, it takes less than a minute to make one. Impress your friends!!!


                BONUS: Once you flatten your layers (CTRL+Shift+Alt+E makes a flattened copy), applying the Oil Paint filter (CS6: Filter > Oil Paint; Above: Filter > Stylize > Oil Paint-- it's not in the older versions I'm pretty sure) can smooth out your lines and make them look like they were brushed in and not rendered so much (I also brightened it a bit):


                Do share your results if you get anything interesting :P

                Comment

                • Trumpet63
                  Mostly Ignored
                  • Mar 2011
                  • 471

                  #23
                  Re: Tutorial Time


                  Hey, cool tutorial! Using roughly the same steps in Pant.net, plus increasing the saturation, I got this result.
                  Last edited by Trumpet63; 07-19-2016, 04:29 PM.
                  2014 October 7th 1:03 AM

                  Zageron: Trumpet
                  Trumpet63: yes, im here
                  Zageron: You have a problem.

                  Comment

                  • Azpb Djbread
                    FFR Player
                    • Jan 2016
                    • 345

                    #24
                    Re: Tutorial Time

                    i have both but photoshop is being a butt so ima use Paint.net

                    Comment

                    • MarioNintendo
                      Expect delays.
                      FFR Simfile Author
                      FFR Music Producer
                      • Mar 2008
                      • 4177

                      #25
                      Re: Tutorial Time

                      I'm really tempted of making a gif of your examples scrolling, get high, and have a good time
                      Last edited by MarioNintendo; 07-19-2016, 06:26 PM.

                      Comment

                      • Trumpet63
                        Mostly Ignored
                        • Mar 2011
                        • 471

                        #26
                        Re: Tutorial Time


                        2014 October 7th 1:03 AM

                        Zageron: Trumpet
                        Trumpet63: yes, im here
                        Zageron: You have a problem.

                        Comment

                        • Azpb Djbread
                          FFR Player
                          • Jan 2016
                          • 345

                          #27
                          Re: Tutorial Time

                          i really suck at this i cant do it xD

                          Comment

                          • Arntonach
                            Owlbears Rock!
                            • Mar 2012
                            • 2494

                            #28
                            Re: Tutorial Time


                            Bored, neat idea.
                            pack of hard stuffs

                            pack of my stuffs

                            Comment

                            • Spenner
                              Forum User
                              • Nov 2006
                              • 2403

                              #29
                              Re: Tutorial Time

                              Originally posted by Azpb Djbread
                              i really suck at this i cant do it xD
                              I highly recommend using photoshop and following the steps if you can lol. That's the most viable way to do it.

                              The results from Paint.net nonetheless look pretty cool, good use of using the tools at hand. I dig that last one Trumpet.

                              And Arntonach, that for SOME REASON reminds me strongly of a lens flare from the mothership of E.T., some faint childhood memory has been tickled.

                              Comment

                              • Spenner
                                Forum User
                                • Nov 2006
                                • 2403

                                #30
                                Re: Tutorial Time

                                Time for another. This one I cooked up myself and I'm quite happy with the results 
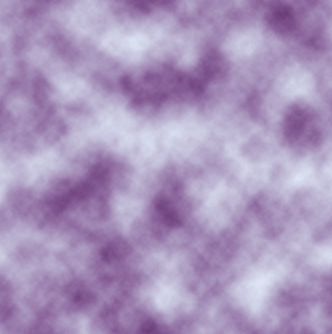
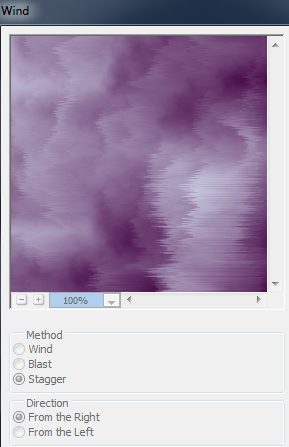
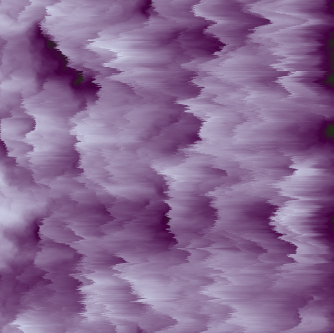
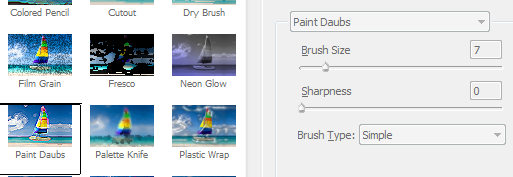
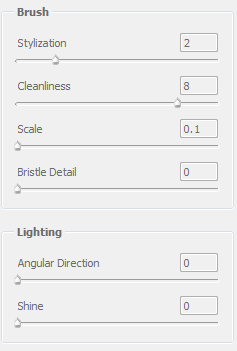
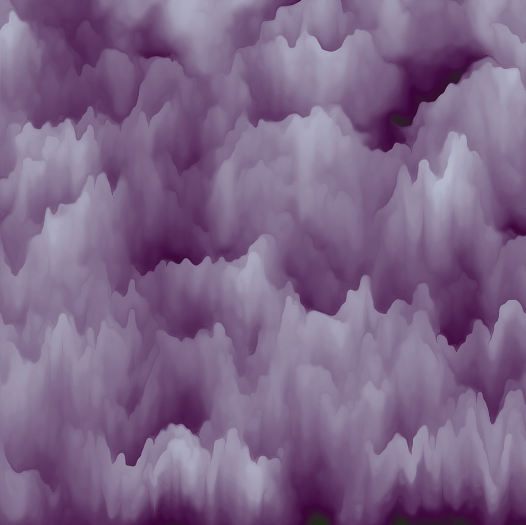
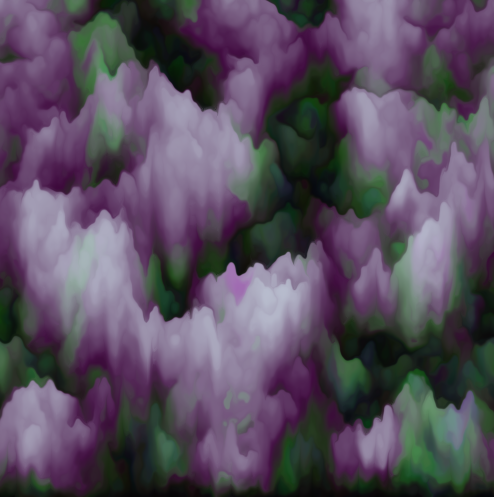
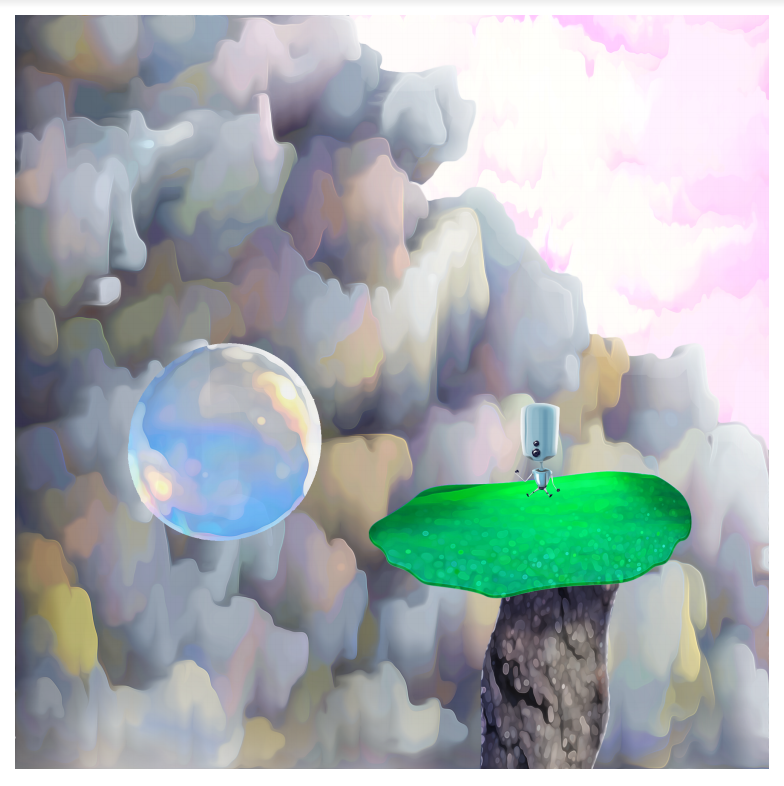
I used to do a lot of mindless stuff trying to automate rendering original images but I never really thought about it very smartly. While at work a few days ago I wrote up a photoshop action to build bump maps and accidentally applied the wrong filter but thought the results were cool. I elaborated on my apparent mistake, and voila!

                                So, starting out, I will be using Photoshop CS6 again.

                                CTRL+N this shit. Set your document size to anything, preferrably a square document. I'll be using 1000x1000px. Must be in RGB to achieve the effect.

                                Choose a VERY LIGHT foreground colour (off-white works best) and quite a dark, but saturated background colour for your swatches. You can hit D then X to get set up with black and white just to see the effect (xd) and colour it afterwards with adjustments.


                                Fill your canvas with one of your colours.

                                Filter > Render > Difference Clouds. Hit CTRL+F a few times so you're set up with a fairly randomized cloud.

                                NOTE: If you want a simpler looking final result, use the regular Filter > Render Clouds at this stage. Difference Clouds will add extra colours to your image, and you may want to avoid this if you want controlled results.


                                Apply Filter > Stylize > Wind. You can choose what you like but for the particular results I'm looking for I choose Stagger. CTRL+F and repeat this filter a couple of times, so you see a bit of variance.


                                Now navigate to Filter > Filter Gallery. Find Paint Daubs under the Artistic folder. I used these settings:


                                Repeat this with CTRL+F once more.


                                Now go to:

                                Filter > Oil Paint (CS6)
                                Filter > Stylize > Oil Paint (CC)

                                Preferably using these settings, although you can tweak the first two options. The filter looks like shite otherwise:


                                Repeat the filter to your liking.


                                CTRL+T, right click, Rotate 90 Degrees CW. Sharpen to taste.


                                Cool technique Spenner, insta-art!!! What else can this process do?

                                Glad you asked, it's actually a process you can loop to build some interesting results, which is why I made some Actions for it.

                                If you repeat the tutorial without the Render > Clouds portion you will end up with some cool textures. Note that the more colours you whipped up with your original Difference Clouds render, the better this loop works out.


                                Psychedelicccccc!

                                For more practical application and artistry, here's an example of an image I started building yesterday in my spare time at work (W.I.P.W.I.P.W.I.P):


                                Innit cute? So, use this "filter" if you want to quickly make some watercoloured looking backgrounds or something, or to embed as a texture onto an object of sorts. Have fun.

                                If anyone wants my set of photoshop actions to play around with (I also made one to automate my previous tutorial) lemme kno and I'll get them when I'm at work again.
                                Last edited by Spenner; 09-24-2016, 06:59 AM.

                                Comment

                                Working...